Is your department utilizing the MSA G1 with the integrated ITIC?
We receive the following questions frequently while training with firefighters using the MSA G1 iTic:
- Why are there so many color palette options?
- Which color palette is the best for us to use?
- How do we program the TIC for the color palette(s) we want?
- How do we change the time-out on the TIC?
Here is a quick guide on the configuration of your MSA G1 ITIC.
First, lets start with the specifics of the ITIC. The ITIC is a Situational Awareness TIC. It is NOT a Decision-Making TIC and should not be used for size-up, search, stream placement, etc.; despite, of what the manufacturer’s instructions say. This TIC fails to meet the criteria of a decision-making TIC. It lacks the resolution, the thermal sensitivity, and it doesn’t have a large enough screen for firefighters to view small objects such as a child’s hand.
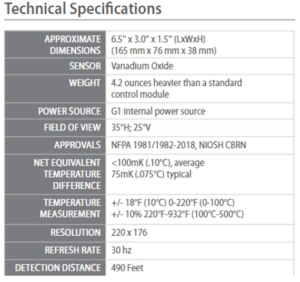
Field of View: 35 x 25 Degrees
Resolution: 220×176 (38,720 pixels)
Detector is manufactured by Seek Thermal
Equipped with a Control Module hose that is 2″ longer than a non-TIC Control Module hose to provide greater range of motion and flexibility for camera use
5 User Selectable Color Palettes, with 22 options to choose from:
MSA offers 22 color palette options, most of which are also available on their other Thermal Imaging devices. We recommend that the ITIC be programed to only display the white-hot palette, as it is the most relevant to interior structural firefighting. Some of the disadvantages of the other color palettes are:
- Black Hot – commonly known as inverse or reverse polarity. In this palette, we would see the hottest areas in black and the colder in white, which is the opposite of what we are accustomed to seeing in our decision-making TIC’s.
- Red Hot – In lower temperature settings, this palette could help located the fire. The problem with this palette is that if we are in a hot environment, our display would saturate red. This palette has its advantages in the decision making TIC for overhaul and fire locating, but detrimental in fire attack, where we are constantly seeing elevated temperatures.
- Fire & Ice – This palette uses colors of extreme contrast to show the differences in areas hot and cold. This can be useful in low temperature environments. In high temperature environments, this palette becomes very difficult to discern.
- Rainbow – In thermography, rainbow color palette is typically used for demonstration purposes to show clients/customers areas of potential interest as they broad spectrum of colors provide a separation of specific areas of interest. However, when the manufacturer doesn’t publish the color/temperature correlations this can lead to confusion or injury. Notice in the adjacent image of the firefighter. The end user would be inclined to think green is cool, but green is just outside of the yellow color spectrum in this palette which is in fact very HOT! Colorization for the sake of color itself is not a good thing. Color must be specific to the environment it is used for and tailored to provide information that does not confuse the end user.
Now, to the fun part: Programming your MSA ITIC:
First it is important to be familiar with the overall configuration of your SCBA. Following the instructions in this guide could lead to unwanted changes to other components of the SCBA and it’s functionality. As you will notice, we will only be looking at the options within the TIC tab.
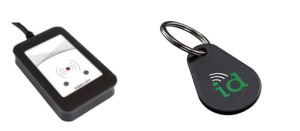
Getting started, you will need to have the MSA A2 Accountability software installed on your computer, the MSA RFID Reader/Writer, and a RFID tag. All of these items can be obtained by your SCBA vendor.
-Note: the MSA A2 software can be downloaded from https://us.msasafety.com/downloads. The software requires an activation key, which can be purchased from your SCBA vendor.
Once you have installed and activated your MSA A2 Accountability software, you can begin the process of configuring your SCBA’ ITIC:
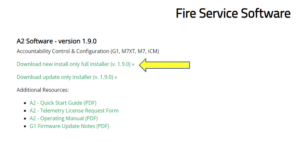
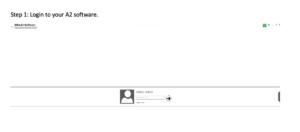
Step 1: Login to your A2 software.
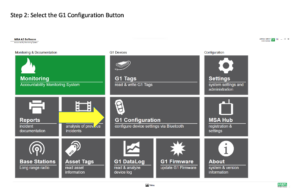
Step 2: Select the G1 Configuration Button:
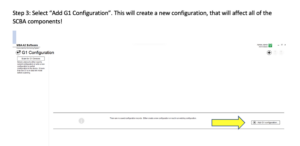
Step 3: Select “Add G1 Configuration”. This will create a new configuration, that will affect all of the SCBA components!
Step 4: Select the TIC Settings Tab:
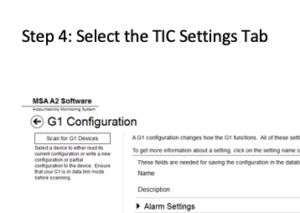
This will open the user selectable options for the ITIC configuration.
Clicking on each of the descriptions will give you a note on what each function is.
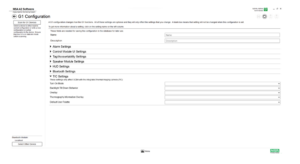
We recommend the following settings:
- Turn On Mode – Disabled: This setting will keep the TIC turned off, until the user activates it, that way air pressure, battery status, etc. is still on the screen.
- Backlight Tilt Down Behavior – Enter Sleep Mode After 10 Seconds: This setting reverts the iTIC / HUD back to the information screen once the TIC is oriented down for 10 seconds. This saves the battery as well as keeps the important air information displayed at a glance. Once the TIC times out, you will have to hold your green side button down to reactivate it.
- Overlay – Enabled: This setting makes sure that any active alarm information shows when the TIC is active.
- Thermography Information Overlay – Disabled: We strongly advocate against spot temperatures. For more information, check out: The Dangers of Spot Temperatures here: https://insighttrainingllc.com/uncategorized/the-danger-of-the-spot-temperature/.
- Default User Palette – White Hot
- User Palette #2 – Leave this blank, unless you want to add other palettes. Once again, we recommend only using White Hot. Being it is a situational awareness camera, the other color palettes can cause unneeded confusion, especially if a firefighter is already in distress.
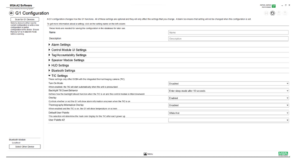
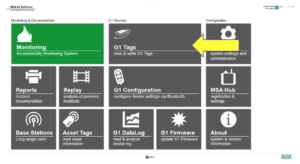
Once you have your desired configuration selected, name and save your settings. Return to the home screen, then select the “G1 Tags” button.
Select the “G1 Configurations” tab
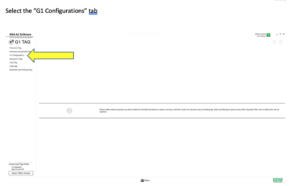
Place a RFID Tag on top of your Tag Writer.
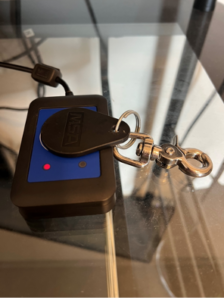
Select the appropriate configuration file and click on the “write Tag” button.
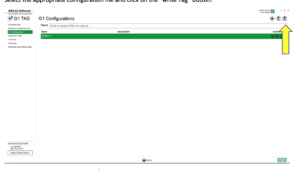
After a few seconds, an Information box will pop up notifying you that the tag write was successful.
Take your RFID tag to your SCBA and follow the RFID paring sequence:
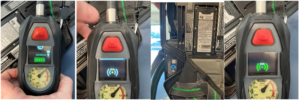
- Press and hold both green buttons simultaneously.
- Press the red button.
- When the RFID icon appears, hold your RFID tag to the green or blue crosshair sticker behind the lumbar support of the SCBA.
- When the RFID Icon turns green on the HUD, you are programmed and ready for work!
We hope that this article helps you configure your departments MSA ITIC!
Thanks for your support, Stay Intelligently Aggressive!
Instructor Tim Mills
Insight Training, LLC
Thermography Certified Fire Service Professionals
