If you or your department own a FLIR K2 situational awareness TIC, we have developed the following guidelines to assist you with this device.
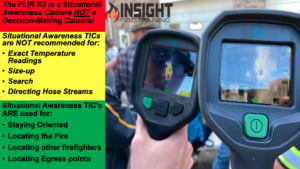
First, this device is a situational awareness TIC and not a decision-making TIC. Please do not confuse the two! If you or your organization is unaware of the difference, please watch the following webinar that is attached to the following article to assist with the explanation. Per our work with the Thermal Imaging Survey in 2022 in Firehouse Magazine, a large percentage of firefighters are unaware of the differences in these two types:
We have created a short educational overview of the FLIR K2 that you may watch on our YouTube channel at Insight Training LLC. Please subscribe to the channel and check out the many other resources available.
The FLIR K2 Overview Part 1:
Do you know the difference between the FLIR K2 and the FLIR K65?
The question we often receive is the following:
“We could only afford a situational awareness TIC or purchased one without knowing the difference; what are our options until we can upgrade to a decision making TIC?”
As someone who grew up in a volunteer fire department with limited funding, I certainly understand this viewpoint. Therefore, the following recommendations are only for those who cannot purchase a decision making TIC and want to maximize their effectiveness with the model they currently have. Please keep in mind the K2 is a low resolution TIC (160×120 equating to 19,200 pixels) and will not produce the higher quality image that one will see on models such as the FLIR K33, K53, K55, and K65 as these are 320×240 resolution or 76,800 pixels which is four times the pixel count of the FLIR K2.
Option 1: Fire ground usage-
The K2 is built to withstand the heat is rugged for fireground usage. However, the 9 hertz refresh rate can become problematic and frustrating to firefighters who only have seconds to make a decision. This model can take up 4 seconds when switching from high to low sensitivity which can equate to a loss of important information for firefighters.
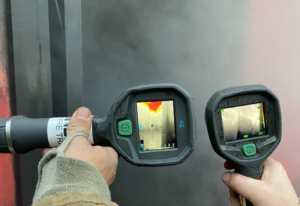
To assist with this, we recommend locking the K2 in low sensitivity mode. This will cause the green triangle to appear in the upper left hand corner at all times when the TIC is powered on. This prevents the delay or lag from high to low sensitivity when the TIC detects significant heat (2% of the pixels detecting over 302 degrees Fahrenheit). However, this disables high sensitivity mode which can cause a loss of detail in lower temperatures. This is why we only recommend this modification if the K2 is being used as an interior firefighting TIC. The following photo demonstrates the two modifications we are discussing in this article. The K2 on the left is locked in Search & Rescue Mode. The K2 on the right is locked in low-sensitivity mode. Their are distinct advantages and disadvantages to both.
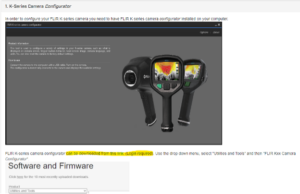
This can be accomplished by downloading FLIR K-Series Configurator (which can be found at this link):
-Note: To access and download the K-Series configurator software, you will need to create an account.
FLIR tools is not in use by FLIR. The previous ‘Offline Mode” has also been discontinued.

Option 2: Exterior use/Size-up or Command Role-
For those departments that have place a K2 in the Incident Commanders use, we recommend locking the K2 in Search & Rescue Mode. This will change the color palette to engage colorization at 200 degrees Fahrenheit instead of 302 Degrees Fahrenheit. This had distinct advantages for the Incident Commander.
- Early colorization equals early warning: In many cases, TI Basic fails to show colorization on the exterior of the structure due to the insulation properties of the building making it more difficult for the first due officer or Incident Commander to locate the fire on their initial 360 with the TIC. By locking the K2 in Search & Rescue Mode, it will show colorization earlier at lower temperatures providing better intel on the interior temperatures of the structure by viewing specific areas of interests where thermal bridging may occur as shown in the following photo:
- Search & Rescue Mode is High Sensitivity only: This means that this mode is a single gain temperature mode which has a maximum temperature range of 302 degrees Fahrenheit. Therefore, it is not recommended for high heat situations as it will saturate and produce a red screen with a lack of discernible detail. This single gain mode prevents the TIC from switching to low sensitivity therefore reduces the delay or lag when the device is being used.
Once you have downloaded and installed the K-Series Configurator software, follow these steps to configure your device(s).
Initial Start-Up screen. You will see this screen when you launch the application. Using the supplied USB cable, connect your device to your computer, and power it on. You will see a spinning circle of dots as the camera loads and the software recognizes it.
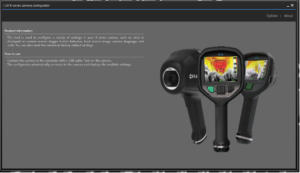
-Note, if you plug the device in prior to starting the software, typically the computer will recognize the device and open the device storage folder. Close this out (the K2 does not offer any sort of DVR / storage capabilities).
If you need to change the language of the software, click the “Options” tab. The “About” tab displays the software version information.
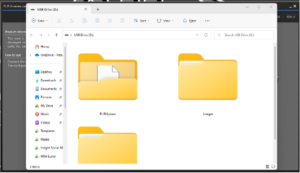
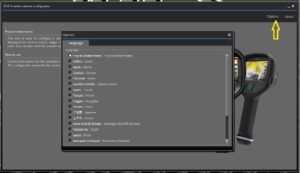
Once the software detects the device, the general settings tab will open.
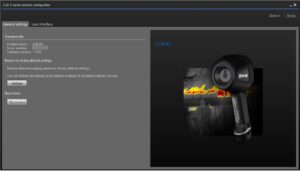
From here, you can begin to configure your device. The “Restore” button will revert the device back to factory settings, with the most current software.
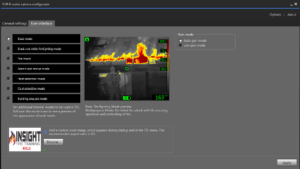
The “User Interface” tab is where you can customize your device. Here, you can select which Application Mode works best for your organization. As stated earlier in this article, we recommend either using Basic Mode or Search and Rescue Mode. We also recommend clicking the circle beside “Low Gain Mode”.
Selecting Low Gain Mode will lock the camera into low sensitivity, reducing the lag time that you would notice in Auto Gain Mode (where the camera would try to switch between High Sensitivity and Low Sensitivity depending on temperatures).
We hope this short article assists fire departments or firefighters who are using this model until they can upgrade to a higher resolution, faster refresh rate, decision making TIC.
Thank you for your support!
Insight Training LLC
Thermography Certified Fire Service Professionals
